Alchatek

Contractor Training Portal

Access the full Alchatek contractor training library.

← All Modules Alchatek ☐ In Progress
Module 09 · Track 3 — Equipment

The Gun:
MixMaster Pro Masterclass

The injection gun is where product meets the job. Colt builds one from a bare block to field-ready in front of the class — every nipple, valve, fitting, and injector — then covers the operating discipline and the cleaning ritual that keep it alive. Specs cross-checked against the MixMaster Pro User Manual v7.0.

10 LessonsAssembly to TeardownEquipment TrackFull Course

After this module, you'll be able to assemble and tear down the MixMaster Pro from a bare block, apply the Teflon rule correctly (pipe threads yes, JIC flares no), run the valves with proper discipline, tune injectors for output and cold weather, execute the end-of-day cleaning that protects the block, and diagnose the common failures from the manual's own troubleshooting table.

Key Takeaways

Ball valves are the primary consumable — expect to replace them weekly or every couple of weeks. Religious cleaning stretches their life; ISO behind the nylon seal ends it.
The Teflon rule has two halves: tape every pipe-threaded connection — but NEVER tape the JIC flared hose fittings. JIC seals on the flare, not the threads.
Valves are all-or-nothing. Fully open or fully closed, both at once — feathering a valve skews the A/B ratio and can back the system up.
Check flush pressure before every single hole. A dead flush line means foam curing inside a $400+ gun while you're still holding it.
O50 injectors both sides is standard; in cold weather run O70 on the B side to keep thick resin flowing. Snug only — the aluminum block is soft.
Store the block with injectors OUT. Residual ISO glues injectors into the block's tight tolerances — the next removal destroys them.
Lesson 1

The MixMaster Pro

The MixMaster Pro is Alchatek's plural-component injection gun — the tool at the end of the heated hoses for slab lifting and Deep Lock work. A and B resin meet inside its mixing chamber, which means the gun lives its whole life one missed flush away from becoming a paperweight. That's why this session exists.

2,000 PSINormal Operating
3,500 PSIFlush System Max
100 PSIInjection-Injury Threshold
400°F+Foam Exotherm

Those numbers are from the User Manual, and the last two are why the Safety module's rules follow this gun everywhere: fluid injection injuries can happen at as little as 100 PSI, and reacting foam in a large mass makes enough heat to auto-ignite. Goggles always; never point it at anyone.

The gun block comes in aluminum (light, inexpensive, soft — never overtighten) and stainless steel (more solid, same care). Colt's format for the session: build one by hand, from a bare block, in front of everyone.

Lesson 2

Gun Block Anatomy

Every port on the block has one job. Learn the map and assembly stops being mysterious:

  • Top — two flush/water ports. Where the flush line enters to blast mixed material out between injections.
  • Sides — A and B injector ports. The precision orifices that meter each resin into the mix chamber.
  • Front — two removable hex plugs + the mix chamber. The plugs exist so you can run a drill bit straight through to clear cured foam.
  • Back — nipple inputs. Where A and B material arrive from the ball valves.
  • Bottom — three threaded holes. The handle mount (Lesson 8 — you may not even use it).
Gun block with ball valves during assembly walkthrough
Hands-on anatomy. The block and its ball valves, mid-walkthrough — note the safety catches on the valve levers.
Lesson 3

Nipples, Ball Valves & the Teflon Rule

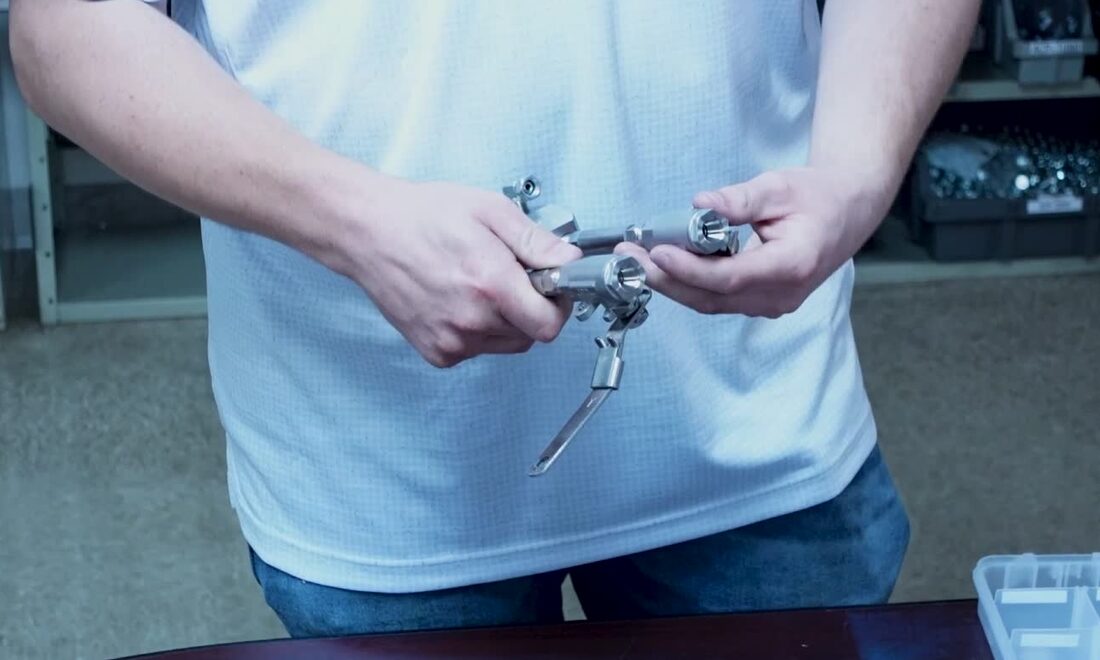
Assembly starts at the back: straight nipples thread into the block, converting its threads to accept the A and B ball valves — the on/off controls for each resin.

"The ball valves, they are a consumable. They're probably the primary consumable on this thing. You're gonna change them out frequently."— Colt, Alchatek Technical Training

What kills them: ISO working its way behind the white nylon seal inside the valve and tearing it, which lets material bypass a "closed" valve. Weekly-to-biweekly replacement is normal; consistent cleaning is what gets you to the long end of that range. (One more seal-killer from the manual: never soak ball valves in AP Soak 130 — the soak chemical itself damages the seals.)

The Teflon rule — both halves. Every pipe-threaded connection gets Teflon tape, no exceptions — a contractor who reassembled without it had foam leaking out mid-job. But the manual is equally absolute the other way on hoses: NO Teflon on JIC flared fittings — they seal on the machined flare faces, tape only fouls them. Threads = tape. Flares = never.
Lesson 4

JIC Fittings — Foolproof by Design

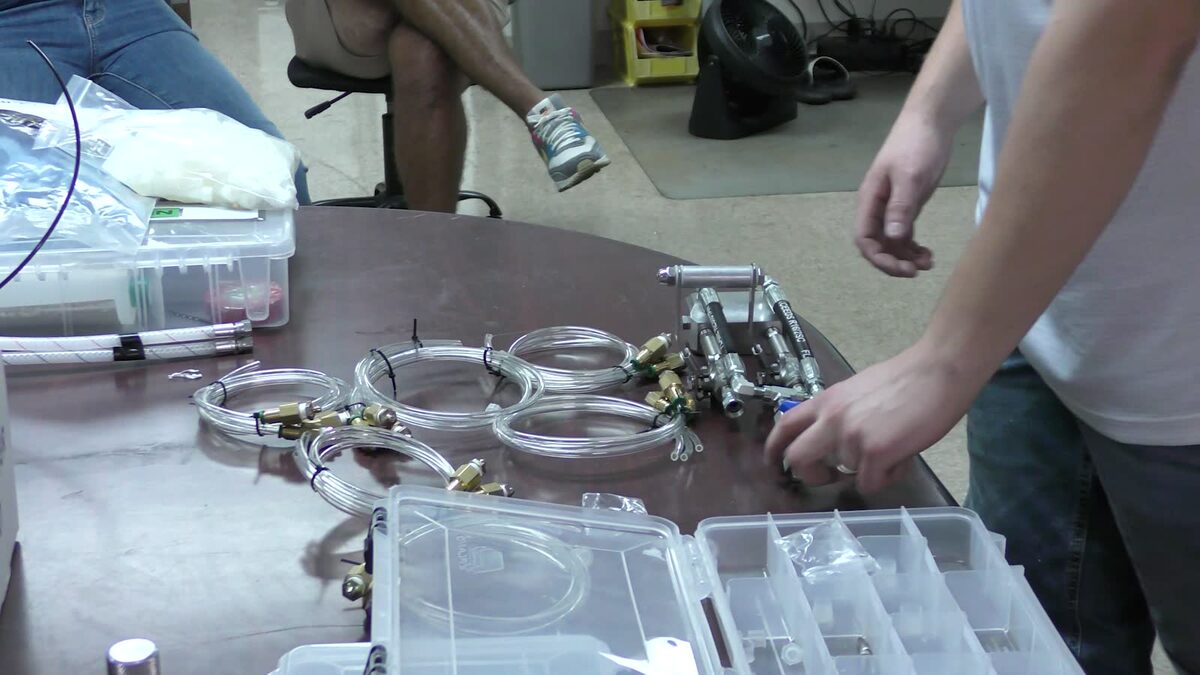
The hoses from the proportioner land on JIC swivel fittings, and the sizing is the safety system: #5 JIC for the Iso (A) side, #6 JIC for the Poly (B) side. The two sizes physically cannot cross-connect — it is impossible to put the A hose on the B port. Both PMC and Graco heated hoses match these fittings.

Lesson 5

Check Balls, Springs & the Flush Plumbing

The flush side of the gun is its own little plumbing project, and it's the part that keeps mixed foam from curing in the block:

  1. 3/8" 90-degree fittings house a spring and check ball — assembly order is spring first, then ball. They hold flush in the block and stop foam from backing up out the top ports.
  2. The line assembly: a T-fitting joins two 90s, a reducer steps the thread down, and the flush valve (the blue-handled one — rated 6,000 PSI per the manual) controls the blast. The swivel connector is what makes field installation painless.
  3. The hose connects at the back and runs to the flush pump — the Titan 440 from Module 08, which delivers exactly the right pressure and volume for this job.
Troubleshooting seed: corrosion builds up inside the spring cavity over time, compressing the spring so the check ball can't move — that's a classic cause of purging problems. When the flush acts weak, this cavity is an early place to look.
Catch the ball. When you remove a check-ball fitting at teardown, the ball can launch — and a check ball lost in trailer gravel is gone. Cup a hand over it.
MixMaster Pro rebuild kit parts laid out
The rebuild kit, spread out. Flush lines, T-fittings, spring/ball sets, injectors, mix chamber tip, and ball valves.
Lesson 6

Front End — Injectors & Mix Chamber

The front rebuilds in minutes: hex plugs back in, the mix chamber (lifting tip) threads into the center, and the injectors — the metering orifices — seat into their side ports. Three sizes:

  • O35 (.035") — less output; rarely used.
  • O50 (.050") — the standard; most contractors run O50 on both sides.
  • O70 (.070") — more output. The winter trick: O50 on A, O70 on B — cold B-side resin runs thick, and the bigger orifice keeps the ratio honest.
Snug only. The aluminum block is precisely machined and soft — use the ½" wrench from the tool kit and stop at snug. Never force or tap an injector that won't seat; pull it and clean the port instead. Forcing it damages the block.

Two connection options at the tip: the 3/8" hammer-in port spins onto the mix chamber (the manual's trick: chuck the port in a cordless drill and spin it on — the threads cut into the nylon), or the button head coupler for galvanized Deep Lock tubing.

Lesson 7

Operating Discipline

  1. Check flush pressure before every hole and every pipe. Flush pressure dies quietly — somebody unplugs the flush pump, or the flush bucket runs dry. Test the blue-handle valve first; skip it and the foam cures in the gun while you work.
  2. Test shot before injecting. Confirms balanced pressures and good foam quality. Never test-shoot with the button head coupler attached — it blows the seal.
  3. Valves fully open or fully closed — together. Quick, smooth motion on the connecting handle, safety catches lifted.
  4. Never park closed without flushing. More than a few seconds with the valves shut and mixed foam starts setting in the chamber — faster materials, shorter grace.
  5. Water-blast the hole first to clear debris before resin, and use a 1-2-3 countdown with your crew on an uncertain shot.
  6. Done with the hole? Flush before you pull off: two one-second bursts in quick succession is the manual's recipe.

"When you open up these valves, they're all the way on, or all the way off. If you go slightly in the middle... you might not have an even mixture coming out."— Colt, Alchatek Technical Training

Lesson 8

The Handle — Optional Equipment

The handle assembly is a bolt, a nut, a spacer sleeve, and four plastic washers — the washers sit on each side of the connection so the handle rotates freely instead of binding.

"The handle is kind of an optional part in my opinion. I know half the contractors I go visit have removed the handle. It's not even there."— Colt, Alchatek Technical Training

Why crews pull it: it gets in the way working tight to concrete, and it finds your knuckles. The current machined aluminum handle is a real upgrade over the old plastic one that snapped — but whether you run one is preference, not procedure. Try both ways; keep what your hands like.

Handle assembly being installed on the gun
Handle going on. Washers each side of the mount so it swings free.
Lesson 9

Cleaning, Soaking & Storage

Teardown is assembly in reverse — flush lines first, then JICs, then ball valves (valves can also be serviced without full disassembly). Then the rules that protect the block:

Two cans, two jobs: AP Pump Flush is a solvent; Surface Guard 125 is a water-based gel for protecting concrete from stains. Only Pump Flush goes in the flush pot — confusing them is a bad day.
Lesson 10

The Troubleshooting Table

Straight from the User Manual — the symptoms you'll actually see and the order to check things in:

SymptomCheck, In Order
A-side pressure highClean the A injector → verify the A check valve works → check the wye strainers on the proportioner
B-side pressure highSame sequence, B side
Only B discharges when valves openClean the A injector; confirm the A check valve is clean, working, and installed in the correct direction
Only A dischargesSame checks, B side
Material leaking past valvesReplace the valves — scarred seals from poor cleaning (or AP Soak exposure) don't recover
Injector won't seat fullySTOP — never force or tap. Remove it and clean the block port thoroughly with a wire brush
Port pulls off the mix chamberClean the mix chamber threads so the nylon port can bite securely
Water leaking from the mix chamberReplace the flush valve and the ball-and-spring check valves
Output too low / too highSwap injectors: .035 for less, .07 for more

Source: MixMaster Pro User Manual v7.0 (rev. July 2025), Troubleshooting section.

Vocabulary

Gun Block
The machined aluminum (or stainless) heart of the MixMaster Pro — every port and channel lives here.
Ball Valve
The A/B on-off valves — the gun's primary consumable, replaced weekly-to-biweekly.
Nipple
Straight fitting converting the block's rear threads to accept the ball valves.
JIC Fitting
Flared hose connector — #5 = Iso/A, #6 = Poly/B; impossible to cross-connect; never taped.
Check Ball & Spring
Spring-first assembly inside the 3/8" 90s — holds flush in, keeps foam from backing out.
Injector
Metering orifice: O35 / O50 (standard) / O70 — and the B-side O70 winter trick.
Mix Chamber
The front tip where A and B combine — accepts hammer-in ports or the button head coupler.
Feathering
Partially opening a ball valve — the forbidden move that skews the A/B ratio.
Blue-Handle Flush Valve
The 6,000 PSI valve that blasts flush through the block between injections.
Flush Pot
The pressurized can (AP Pump Flush + 80–120 PSI air) for the end-of-day A-side clean.
AP Soak 130
Heated soak (~130°F) that softens cured foam — metal parts only, never ball valves.
Rebuild Kit
Flush lines, T-fittings, spring/ball sets, injectors, mix chamber tip, and ball valves — the full refresh.

Knowledge Check

Score at least 4 of 5 to unlock module completion.

Q1. Where does Teflon tape go on this gun?
Every connection on the gun, including the hose fittings
Every pipe-threaded connection — but never on the JIC flared hose fittings, which seal on the flare
Nowhere — modern fittings don't need sealant
Q2. Why must the ball valves be fully open or fully closed — never in between?
Partial opening wears out the valve handle
It saves resin
Feathering skews the A/B mixture ratio and can back up the system — bad foam comes from uneven mix
Q3. What do you verify before injecting every single hole or pipe?
Flush pressure, via the blue-handle valve — if the flush line is dead, mixed foam will cure inside the gun
That the handle is mounted securely
The color of the A-side resin
Q4. It's 38°F and the B-side resin is running thick. What's the injector play?
O35 on both sides to slow everything down evenly
Keep O50 on A and step the B side up to O70 — the larger orifice keeps thick B resin flowing and the ratio honest
Remove the B injector entirely until it warms up
Q5. The gun is cleaned and going into storage. Where are the injectors?
Torqued firmly into the block so they don't get lost
Soaking in AP Soak 130 with the ball valves
OUT of the block — residual ISO glues them into the tight tolerances, and the next removal damages them
Saved — your progress is updated on the Training Hub.
← Titan Impact 440 The Rig Masterclass →