Alchatek

Contractor Training Portal

Access the full Alchatek contractor training library.

← All Modules Alchatek ☐ In Progress
Module 14 · Track 3 — Equipment

PolyShark
Masterclass

The complete operating course for Alchatek's single-component injection rig — from priming and batch mixing to live injection, flow control, and the cleanup procedure that decides whether your pump survives the year. Taught by Colt, Alchatek's lead technical trainer.

10 LessonsSingle-ComponentGas-Over-HydraulicMasterclass + Rig Review Combined

After this module, you'll be able to prime, run, and shut down a PolyShark on a real job — batch mix catalyzed resin without wasting product, control injection to avoid fracturing, and execute the flush-and-store procedure that prevents the service calls that take rigs out of the field.

Key Takeaways

One principle runs everything: priming, injecting, flushing, and storing are all just displacing one fluid with another.
Two parts cause most no-prime service calls: the suction-hose cam-lock gasket and the foot valve. Check them first, every time.
Crack the valve — never swing it open. Injection is about controlled fill. Excess pressure fractures the soil and sends resin where you don't want it.
Batch mix in stages. Never catalyze a whole tote — catalyzed resin has roughly two weeks of usable life in warm conditions.
Stage your injections: pump a half gallon, stop, let it kick, then stack the next shot on top of it.
Cleanup is the most critical procedure on this rig. Flush until clear, recirculate your flush, and protect the packings with pump saver before storage.
Lesson 1

Meet the PolyShark

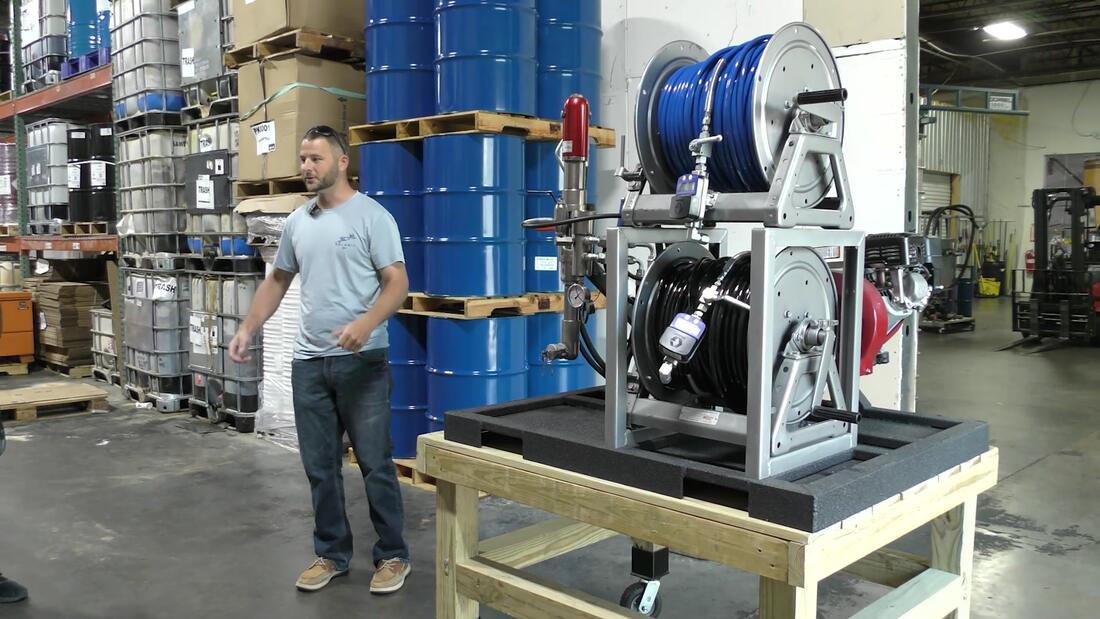
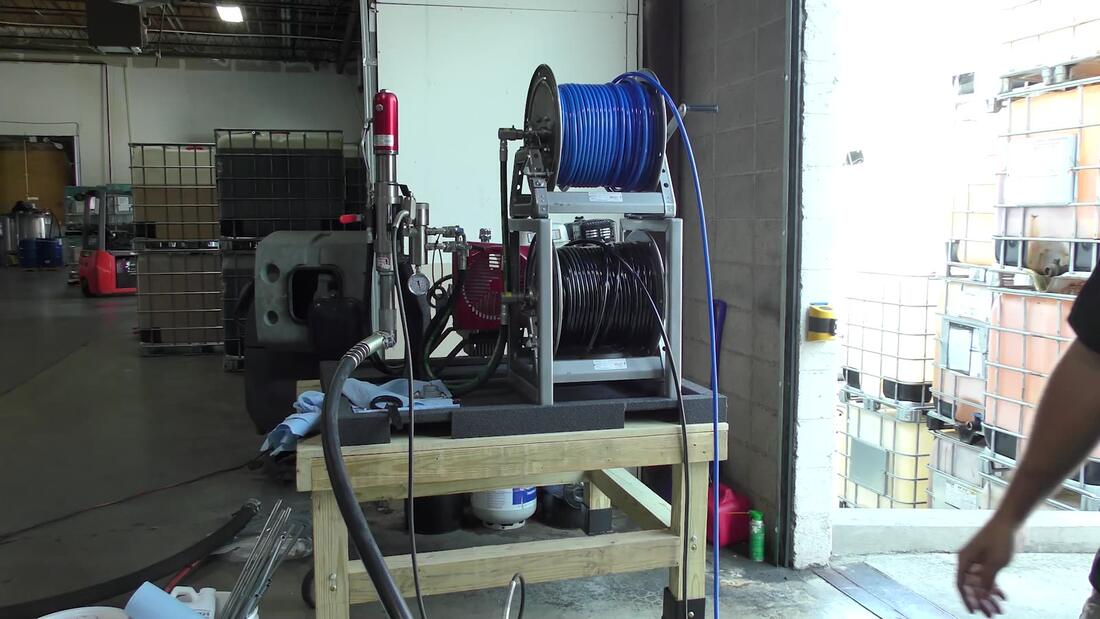
The PolyShark is Alchatek's single-component, gas-over-hydraulic injection rig. A hydraulic ram drives the pump piston; the pump pulls catalyzed resin through a suction hose and delivers it down the injection hose to your rod. There are no proportioning ratios to manage — you're pumping one pre-mixed fluid.

Why the rig exists: before the PolyShark, single-component crews ran multiple Titan 440 airless pumps with two laborers constantly filling pails, adding catalyst, shaking, and swapping them on the pumps. The PolyShark replaces that entire circus — it pulls straight from a tote or batch container and runs all day.

The mental model the trainer hammers home: every operation on this rig is displacing one fluid with another. Priming displaces pump lube with chemical. Flushing displaces chemical with cleaner. Storage displaces cleaner with pump saver. Once you see the machine that way, every procedure makes sense.

Injection-injury hazard. This is an airless high-pressure system — a fluid stream can pierce skin and underlying tissue. Never point the gun at anyone, never put a hand in front of the tip (gloves won't protect you), and always relieve pressure before service. A spray injury is a medical emergency, not a cut — see a doctor immediately. The skid is a three-person lift.
Operate visually, not by numbers. Experienced operators aren't staring at the gauge — they're watching fluid behavior: color changes, flow at the rod, pump stroke rhythm. New operators typically develop that feel after four or five jobs.
PolyShark rig with hose reels
The PolyShark rig. Hydraulic power unit, piston pump, dual hose reels, and suction line — built to pull from totes or batch containers and run continuously.
Working on the PolyShark pump
At the pump. The suction connection, filter housing, and foot valve are where priming problems live — learn these three spots and you can fix most field failures.
Lesson 2

Priming & The Two Failure Points

The pump ships and stores with pump lube in it. Priming on a job is simple displacement:

  1. Drop the suction hose (with screen) into your mixed chemical. Keep a bucket of pump lube staged beside it.
  2. Turn the pump on. It begins displacing the lube back out — watch the return.
  3. Watch for the color change. When chemical replaces lube, shut it off.
  4. Pump roughly another half gallon into your trash container to clear any remaining lube, then connect to your rod.

When a PolyShark won't prime, it is almost always one of two parts. First: the suction-hose cam-lock gasket. Resin exposure hardens the seal until it stops sealing, and the pump pulls air instead of fluid. Second: the foot valve — the check valve at the bottom of the suction line. If it sticks, nothing moves. Carry spares of both; they're cheap and they're the fix for most "the pump's broken" calls.

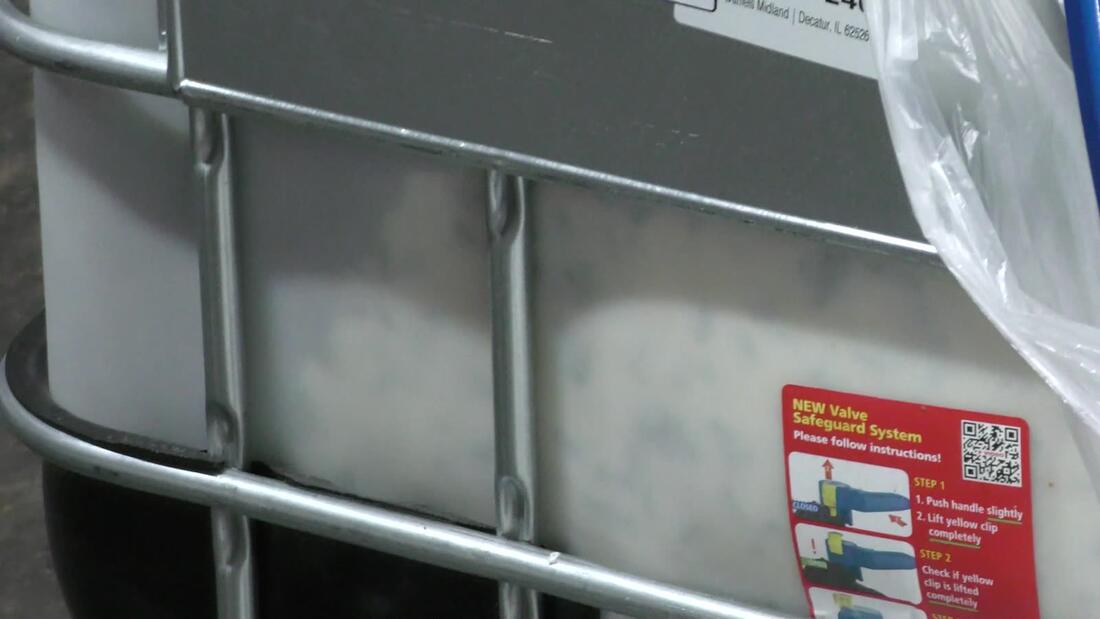
Know your two cam-lock sizes: the pump runs 1-inch cam locks; every Alchatek tote has a 2-inch cam-lock fitting on the bottom. The gaskets are a commodity item — any hydraulic or tractor supply store carries them, and they come in bags by the thousand. There is no excuse for a rig rolling out without spare gaskets in the toolbox.

Never open the filter housing on a primed pump. Even when the gauge reads zero, residual pressure can push out a quart of chemical — and the moment it hits humidity it starts kicking. Drop the prime hose in a bucket and bleed the pressure off first. Check the filter housing at least every other job.
The $10 filter trick. The factory inline filter clogs and is tedious to clean (an hour soaking in Alchatek Soak 130 brings it back). Veteran crews buy a roll of aluminum window screen, zip-tie a square over the suction inlet, and cut it off and replace it at every job. A whole roll costs about ten dollars.
Lesson 3

Hydraulics, Pressure & Hose Management

The hydraulic ram drives the piston. Here is the most misunderstood fact about this rig: turning the pressure up does not increase pressure at the point of injection. It increases how fast the pump can deliver. Open your valve with the system cranked high and it sends a gallon much faster — which is exactly how new operators lose control of an injection.

The hose reels carry the fluid through the reel swivel itself. Alchatek upgrades every reel to a 10,000 PSI swivel as blowout insurance, but the rule still stands: relieve system pressure before you crank a reel. There can be close to 3,000 PSI sitting in those hoses after you shut down.

  • Run the pump at lower pressure while operators are learning — watch the product, not the gauge.
  • Bleed pressure with the prime hose (the black hose): open it slowly into a container until the gauge falls.
  • Reel hoses one at a time. Pull both back together and the line memory twists them into the biggest knot you've ever seen.
  • Keep the system closed when idle — cap and plug every open fitting so moisture never gets in.
  • Hose inventory: each reel carries a 100-ft section (~$120 each). Rigs ship with spare blue and black hoses — keep it that way.
  • Engine basics: the Honda GX runs roughly 4 hours on a tank. Keep up with oil changes — it's the cheapest insurance on the rig.
Finding a clog is easy. Pressurize the line to operating pressure and walk the hose with your hand: the hose is rigid up to the clog and soft past it. Cut out the clogged section and re-fit — don't fight it at the gun.
PolyShark hydraulic ram
The ram. Gas-over-hydraulic drive — pressure setting controls delivery speed, not injection pressure.
Pump and hose reel
Fluid runs through the reel. Upgraded 10,000 PSI swivels — but always bleed pressure before cranking.
Resin tote with valve instructions
Working from totes. The flow out of a tote valve is strong enough to mix catalyst on its own — no mechanical mixer needed.
Lesson 4

Batch Mixing & Catalyst

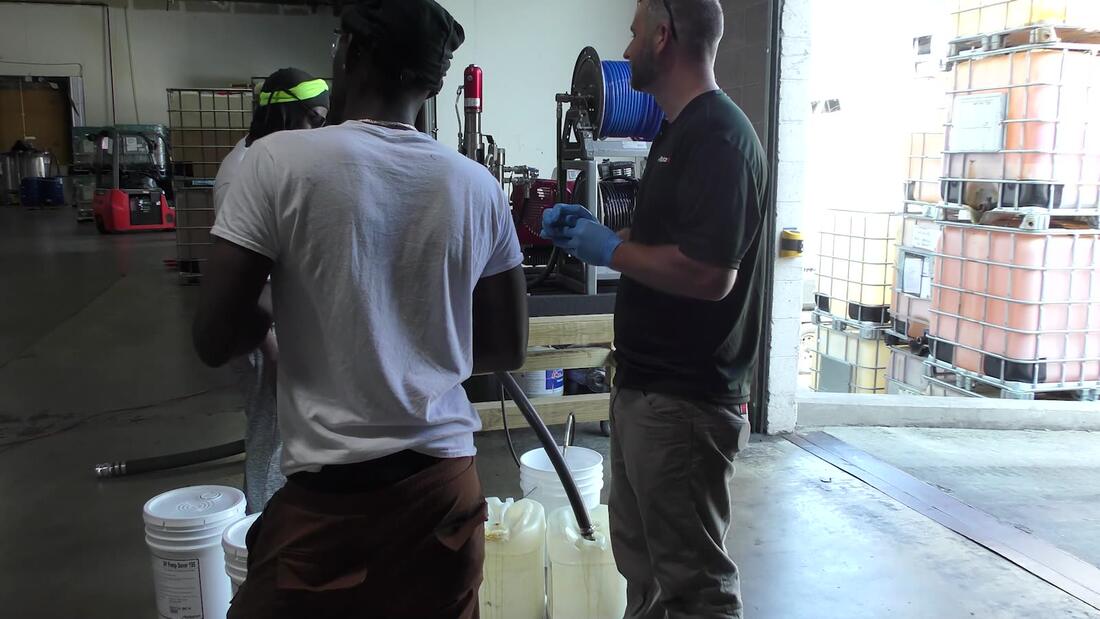
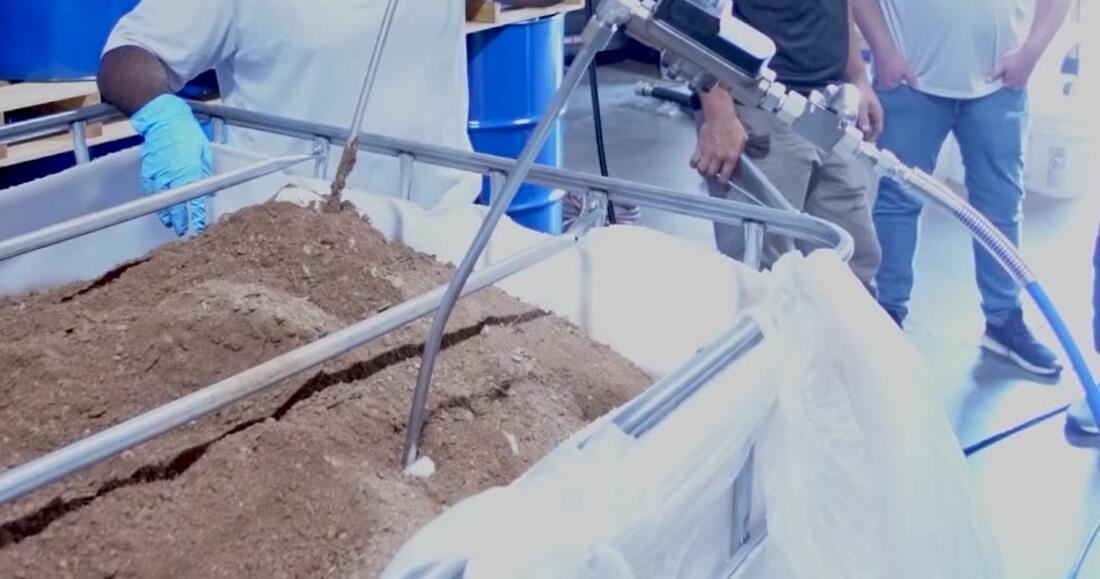
The standard field setup is a 40-gallon Brute trash can staged next to the rig (in a trailer or flatbed, the tote rides over the axles right behind the pump). The procedure:

  1. Catalyst goes in the trash can first.
  2. Open the tote valve into the can — the flow itself mixes the catalyst. Skip the drill mixer; resin builds up on it all day until it's bigger than the hose.
  3. Drop the suction hose (screen down) into the can and pump.

Why batch instead of catalyzing the tote? Once resin is catalyzed you have roughly two weeks to use it in warm conditions before it coagulates too thick to pump. If your job needs the whole tote — catalyze the whole tote and pump straight from it. If there's any chance of leftover, batch it. A typical residential seawall runs about 100 gallons — that's two and a half trash cans, and each one takes five minutes to fill. Five minutes of mixing beats writing off a few hundred gallons of product.

2–10%Cat 106 range (AP Fill 700)
5–10%Gen Cat range (AP Fill 720)
~2 weekscatalyzed shelf life (warm)
100 galtypical residential seawall

Catalyst percentages and rise times vary by product and temperature — always confirm against the current TDS for the resin you're pumping (set times range from ~20 seconds to several minutes depending on catalyst type, dose, and temperature).

The tote quirk — learn it before it costs you a morning. Hooking the 1-inch suction hose straight to a tote's bottom valve will not prime — period. Field-proven, repeatedly: you must use the 2-inch tote hose assembly as the intermediary (big green hose to the tote valve, black hose from there to the pump foot). Also: tote product develops a catalyzed skin on the surface — don't chase the last few gallons out of a tote.
Save your catalyst pails. Empty five-gallon catalyst pails are your trash containers for the day — every prime, flush, and purge needs somewhere to go, and a lidded pail disposes cleanly in a dumpster.
Never run the pump dry. When you're getting low, pick the can up and tilt it toward the suction screen for the last couple of gallons — but watch it. Pull trash or air into the pump and your day changes.
Lesson 5

Rods, Fittings & Job Setup

The consumables on this rig are simple: AP ½″ steel injection tubing (4,800 PSI working pressure), compression fittings (ferrule + nut), and wing nuts. Learn the compression fitting once and never fight it again: the nut goes on first, then the ferrule — tightening the nut swages the ferrule into the fitting and mechanically crimps it to the pipe. That crimp is what holds against thousands of PSI. The ferrule also keeps the fitting from spinning freely on the pipe, which is exactly what makes knock-off quick-connects miserable to tighten.

Rod prep depends on the ground: cut the rod tip at 45 degrees for seawall and erosion work; in hard ground for soil stabilization, drive it with a sacrificial carriage bolt in the tip so the rod doesn't plug with soil. Before you connect, pre-pump a little resin through the rod — if the tip picked up a dirt plug on the way down, you want to find out now, not at 3,000 PSI.

"There's nothing more critical than excavation support — it gives you a visual everywhere your columns will be. You're not just taking a laborer's word for that."— Colt, Alchatek Technical Training
Lesson 6

Live Injection — The Staged Fill

Connect the hose to your rod, confirm the valve is closed, bring the pump up — and then do the thing that separates trained operators from everyone else: crack the ball valve. Don't open it.

Injection on this rig is about fill, not force. Crack the valve until you see fluid movement, let the ground take what it wants, and watch the pump strokes — they tell you exactly what's happening underground. When the ground stops taking fluid, the pump stops stroking. Shut the valve.

  1. Crack the valve — just enough for visible fluid flow.
  2. Put down about a half gallon, then shut off.
  3. Wait a couple of minutes. Let that resin kick and start expanding.
  4. Inject the next shot — it stacks on top of the expanding column instead of pooling at the bottom.
  5. Repeat to refusal, watching strokes the whole time.

The demo uses Alchatek's single-component, water-activated foam line (AP Fill 700 / AP Fill 720 — per the TDS, AP Fill 720 free-rises as much as 40–49X with Gen Cat at 77°F). That expansion is also a trap: if resin mushrooms around the top of the rod, it locks the nut and ferrule in foam. You'll be coming back with a grinder to nip the rod top off. Keep the rod top clean while you work.

Mind your flow meter's pressure limit. Per the PolyShark User Manual, the Macnaught inline meters fail above 2,000 PSI (Graco meters: 1,500 PSI). Run the lowest pressure the job allows, and put clear packing tape over the meter screen so resin doesn't stain it.
Watch for running empty. When the chemical runs out the pump strokes race. Catch it before that — never let it suck air on an open hole.
Never let anyone hammer a rod while the valve is open. If a rod clogs and someone drives it with pressure in the line, the result is a mess at best.
Injection rod with flow meter in soil test bed
The soil test bed. Rod set, flow meter inline, valve cracked for controlled fill — the operator is reading flow and strokes, not forcing product.
Lesson 7

Flow Control, Fracturing & Refusal

Single-component resin permeates and encapsulates slowly — it soaks through the soil matrix and binds it. Two-component foam displaces rapidly. Respect the difference: single-component work rewards patience.

Fracturing is the failure mode that kills jobs. Put too much pressure on the ground and it cracks — and that crack becomes the new path of least resistance. Resin has traveled 60 feet from the injection point down a fracture. That's product you paid for, stabilizing soil nobody asked about. If an engineer digs out a column and finds it wandered off-target, you're absorbing that cost.

Crack injection and leak-seal work follow the same discipline at smaller scale: barely crack the ball valve — you'll feel the system push back against you, then flow starts. Open it too wide and you'll blow the packer right out of the crack. Slow and controlled wins every time.

"The resin is always going to take the path of least resistance. If that hole is that big around the rod, it's going to come out the top."— Colt, Alchatek Technical Training
Lesson 8

Job Site Setup & Housekeeping

Two site rules pay for themselves on every job. First: park the flatbed over your drill points when you can — the truck protects the work area, keeps hose runs short, and puts your batch cans next to the pump. Second: this resin stains everything it touches, permanently. Plastic-sheet the driveway and any finished surface on residential and apartment work before the first gallon moves.

Lesson 9

Cleanup — The Skill That Keeps You Running

"This is the most critical part — you need at least a basic knowledge of how to get these pumps somewhat clean. There's only me and Jacob, and there's about sixty of these in the market."— Colt, Alchatek Technical Training
  1. Leave the rod in the ground. Disconnect at the rod and let the line's residual drain there.
  2. Reel hoses one at a time — disconnect one at the pump, reel it, then the next.
  3. Pump down, ram off.
  4. Bleed pressure through the prime hose — open it slowly into a pail. There can be ~2,500 PSI still in the lines. Only crank reels after the gauge dies.
  5. Flush the suction hose first. Then pull AP Flush 121 through the whole system, pushing the bulk of the resin into your trash container until the fluid runs clear.
  6. Recirculate. Once it's running clear, redirect the return into the cleaner pail and loop it — you'll recover ~90% of your flush, and it's reusable three or four times.
  7. Pumping resin out of the lines? On a job, that recovered resin goes back into the batch container — you've got about two weeks to use it.
The multi-washer valve sticks. The flush valve runs a series of eight washers that clog with resin over time — work the handle back and forth several times during every flush to keep them clean, and shut it between steps so the flush stays clean.

Expect to burn flush fluid — it's a known cost of the system. The name of the game is keeping the rig as clean as possible, every single day it runs.

Flushing the PolyShark lines
Working the flush. Lines disconnected one at a time, residual drained, cleaner pulled through the system.
Flush fluid running into a pail
Run it until it's clear. Dark return means resin is still in the lines — keep pumping before you recirculate.
AP Pump Saver buckets
AP Pump Flush and AP Pump Saver — the two pails that decide how long your packings last.
Flow meter and gun over flush bucket
Gun and flow meter live in the pail — flushed, capped, and never carried loose.
Lesson 10

Storage & Pump Saver

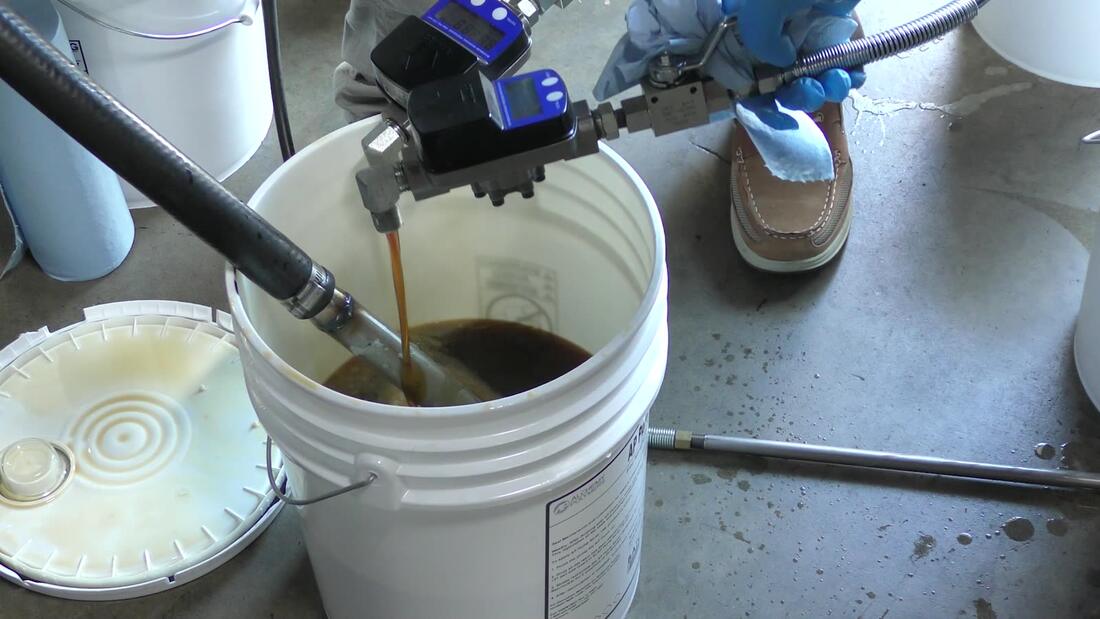
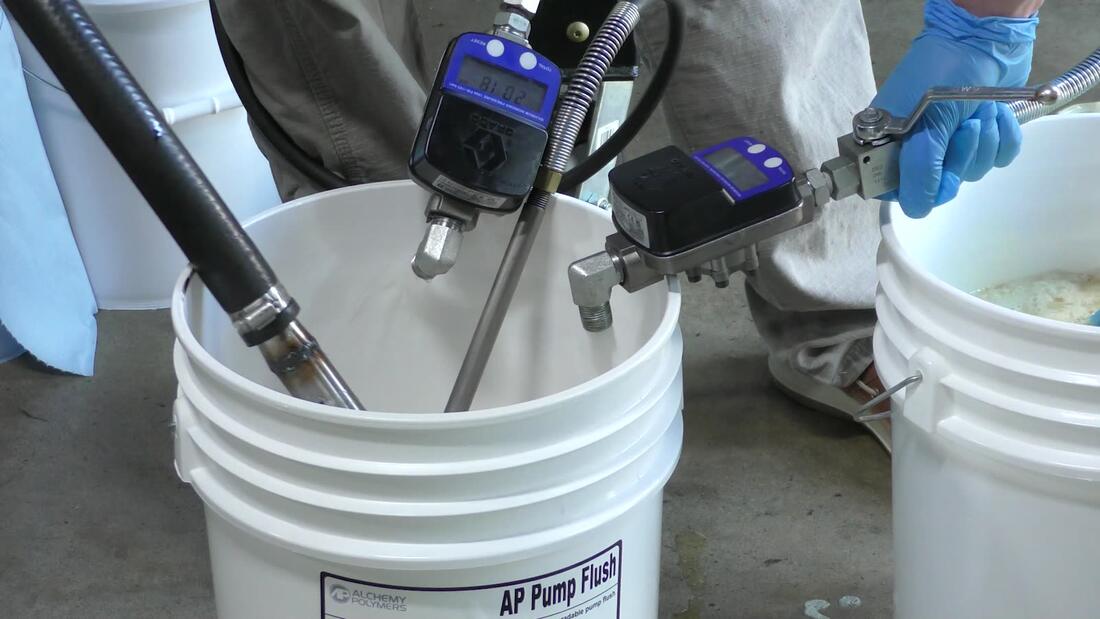
Daily storage (rig runs again tomorrow): flush, then leave cleaner sitting in the hoses overnight. Pull the suction hose and let the residual drain. That's it — though budget two or three days of purging to get all that cleaner out of the system when you return.

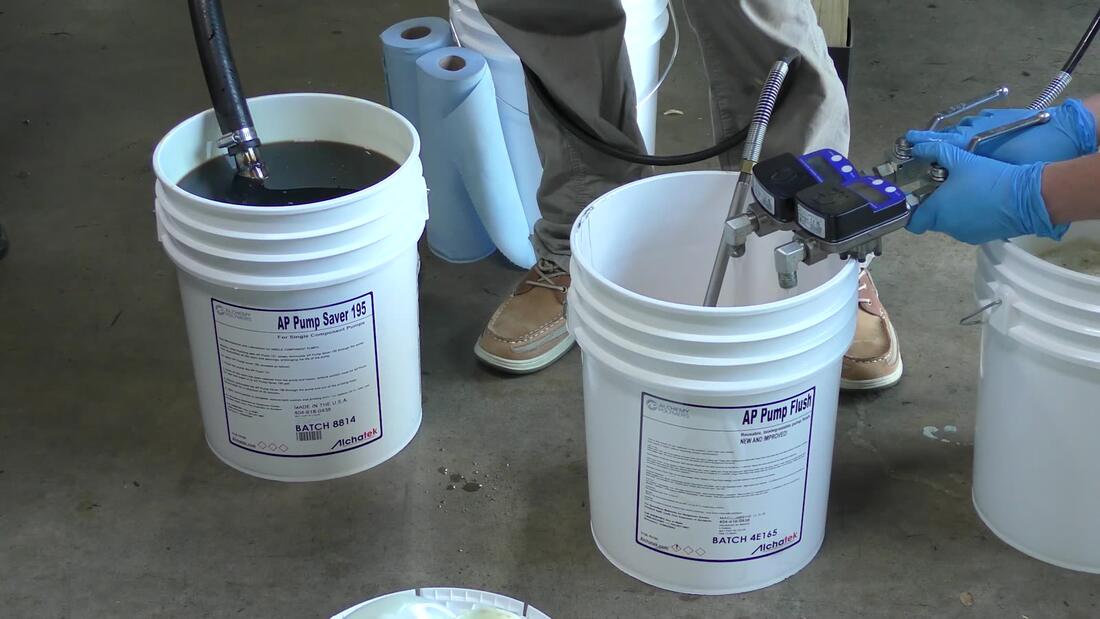
Long-term storage: flush with AP Flush 121 until the return is 100% clear, then displace with Pump Saver 195. The pump's piston packings are nylon and leather, riding in an internal oil bath that lubricates them on every stroke. Over time the packings score and wear — Pump Saver 195 conditions the seals and fills those scores so the pump holds prime and doesn't leak when you need it next season. Run it weekly if the pump works daily, and any time the unit goes into storage.

The oil cup is daily maintenance. Per the User Manual: clean the oil cup section every day it runs (a little poly mixed into the oil is normal), wash it out with brake cleaner, and refill it half full with Pump Saver 195. Skipping this is the #1 cause of premature upper packing and seal failure.
  • Flush to clear — no shortcuts on long-term storage.
  • Displace cleaner with pump saver until it appears at the return.
  • Cap and plug every fitting. Closed system, always.
  • Store the gun and flow meter flushed, in a lidded pail.

Vocabulary

PolyShark
Alchatek's single-component, gas-over-hydraulic polyurethane injection pump rig.
Ram
The hydraulic actuator that drives the pump piston.
Foot Valve
Check valve at the bottom of the suction line that prevents backflow — a common no-prime culprit.
Cam-Lock Gasket
Seal on the suction hose quick-connect; hardens with resin exposure until the pump pulls air.
AP Fill 700 / 720
Alchatek's single-component, water-activated injection resins — AP Fill 720 free-rises up to 40–49X (per TDS).
Batch Mixing
Pre-mixing resin and catalyst in containers (Brute cans) instead of catalyzing a whole tote.
Refusal
When the ground stops accepting resin — the signal that a section is full.
Fracturing
Excess pressure cracking the soil, creating an unintended resin path — up to 60 feet off target.
Pump Saver 195
Conditions pump seals and packings; used weekly, at storage, and in the oil cup (filled halfway).
Oil Cup
Reservoir that lubricates the upper packings — cleaned daily and refilled half full with Pump Saver 195.
Compression Fitting
Ferrule-based rod connection — the nut swages the ferrule onto the pipe for a mechanical seal.
Cam Lock
Quick-connect hose coupling — 1″ on the pump, 2″ on every Alchatek tote. Gaskets are cheap; carry spares.
Packer
Injection port set in a crack for leak-seal work — over-pressure blows it out; barely crack the valve.
Prime Hose
The black hose used for priming and for bleeding system pressure before reeling or service.

Knowledge Check

Score at least 4 of 5 to unlock module completion.

Q1. What single principle explains priming, flushing, and storing the PolyShark?
Keeping the ratio of A and B components balanced
Displacing one fluid with another
Maintaining maximum hydraulic pressure at all times
Q2. A PolyShark won't prime on a service call. What do you check first?
The hydraulic oil level and engine RPM
The hose reel swivels
The suction-hose cam-lock gasket and the foot valve
Q3. Why do you crack the ball valve instead of opening it fully during injection?
Excess pressure can fracture the soil and send resin down unintended paths — as far as 60 feet away
The valve wears out if opened fully
It keeps the resin from curing inside the tote
Q4. You're setting up to pump directly from a tote. What does the field experience say?
Connect the 1-inch suction hose straight to the tote's bottom valve
You must use the 2-inch tote hose assembly as the intermediary — a 1-inch hose straight off the tote will not prime
Totes can't be pumped from directly at all
Q5. How do you locate a clog in an injection hose?
Replace the entire hose — clogs can't be located
Listen for a whistling sound at the gun
Pressurize the line and walk the hose — it's rigid up to the clog and soft past it; cut out that section
Saved — your progress is updated on the Training Hub.
← Equipment Masterclass: PolyBadger Geotech Equipment Overview →